Monday:
1. What is the class format?
Monday: Quiz, Lab intro, Lab, and Wrap-up.
Wednesday: Lab and Wrap-up.
Friday: Blog discussions and Post-quiz.
2. What are the important safety rules?
•Remember where the fire extinguisher and first
aid kits, and remember telephone and emergency numbers.
•Don’t work with the defective equipment.
•Clean/tidy up!
•Power off while not working.
•Grounding.
•No wet hands.
3. Does
current kill?
Yes!
4. How do you read color codes? (Video)
5. What
is the tolerance? Give an example from your experiment
Tolerance is the amount error that there can be
from the designed resistance. The tolerance on our resistors was five percent,
so this means the resistance in them could be five percent higher or lower of
the intended amount. For example our 1500 ohm has a tolerance of five percent,
and our measured amount was 1490 ohm. So this is within .67 percent which is
within the allowed five percent tolerance.
6. Prove
all your resistors are within the tolerance range
Resistor value (Ohm)
|
Actual value (Ohm)
|
Error percentage (%)
|
1.5k
|
1.49k
|
0.67
|
120
|
119
|
0.83
|
360
|
355.8
|
1.167
|
150k
|
147.7
|
1.53
|
15k
|
14.75
|
1.67
|
1.5k
|
1.48k
|
1.3
|
2.2M
|
2.2M
|
0
|
47
|
46
|
2.1
|
2700
|
2708
|
0.3
|
820
|
816
|
0.49
|
The error percentages of all resistors are smaller than 5%,
so all the resistors are within the tolerance range.
Wednesday:
1 1. What is the difference between measuring the
voltage and current using a DMM? Why?
When you measure voltage with the DMM you measure it in parallel. When you measure the current you need to break the loop and take the measurement with the DMM in series with the circuit. You measure the voltage in parallel because you are measuring the difference across two points. In order to measure the current, the DMM must be in series with circuit so the current will flow trough the DMM.
When you measure voltage with the DMM you measure it in parallel. When you measure the current you need to break the loop and take the measurement with the DMM in series with the circuit. You measure the voltage in parallel because you are measuring the difference across two points. In order to measure the current, the DMM must be in series with circuit so the current will flow trough the DMM.
2 2.
How many different voltage values can you get
from the power supply? Can each one of them be changed to any value?
For first channel the voltage is fixed at 5 volts, the other two can be adjusted anywhere between 0 and 25 volts.
For first channel the voltage is fixed at 5 volts, the other two can be adjusted anywhere between 0 and 25 volts.
3 3.
Practice circuit results (video) & (photo)
Measure voltage:


Measure current:

4 4.
How do you experimentally prove Ohm’s Law?
Provide measurement results. Compare calculated and measured voltage, current,
and resistance values. (Experimental setup photo)
Ohm's Law: voltage/current = resistor.
For the 147.7kΩ (measured value):
Voltage (V)
|
Current (A)
|
Resistor (Ω)
|
5.02
|
0.0337
|
148.96
|
7.57
|
0.0511
|
148.14
|
10.09
|
0.0682
|
147.95
|
12.68
|
0.0857
|
147.96
|
15.01
|
0.1016
|
147.77
|
17.43
|
0.1180
|
147.73
|
For the 14.75kΩ (measured value):
Voltage (V)
|
Current (A)
|
Resistor (Ω)
|
5.01
|
0.3395
|
14.75
|
7.57
|
0.5134
|
14.74
|
10.1
|
0.6842
|
14.75
|
12.7
|
0.8600
|
14.74
|
15.0
|
1.0190
|
14.73
|
17.4
|
1.1835
|
14.73
|
The experimental set up will be the same us measuring voltage and current.
Measuring current:
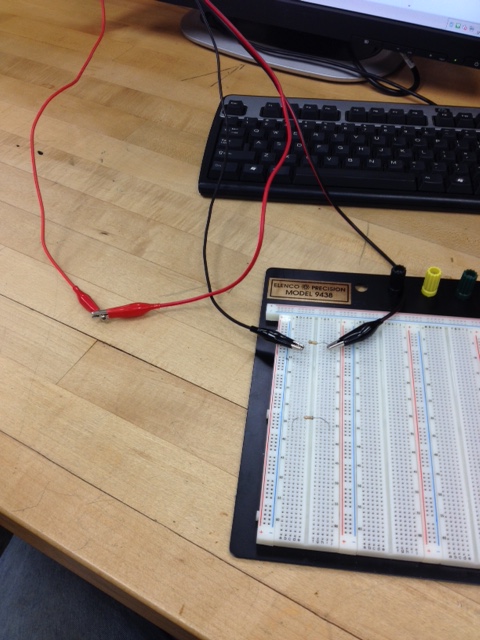
Measuring voltage:

5 5.
Rube Goldberg circuit (video).
Friday:
1. Draw the circuit diagram for the Rube Goldberg set-up.


2. How can you implement this setup into a Rube Goldberg
machine? Drawing required.

- At what value does the current kill?
ReplyDeleteThis comment has been removed by the author.
ReplyDelete- How is the photosensor and motor circuit related to this Rube Goldberg setup?
ReplyDeleteI like your idea for the rube goldberg machine with the hair dryer.
ReplyDelete